
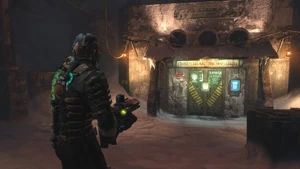
The elevator that goes to the tram area underneath Tau Volantis.
Disposal Services is a location on Tau Volantis in Dead Space 3 and the site of an optional mission of the same name.
History[]
Events of Dead Space 3[]
Disposal Services is available on [[Chapter 14: Everything Has Its Place|Chapter 14] after Isaac Clarke finds the key in the Geology Sector of Facility Two. The player can head there to see if anything had survived the Scenario Five purge. Indeed, some useful supplies were stored in the deepest part of the warehouse after a quarantine lockdown.
Gameplay[]
Geology Access[]
You will be able to access this optional mission once you have visited the Geology Sector during Chapter 14 and picked up the Disposable Services Key. After sending back the final Rosetta piece in the Geology Labs you need to return to our friends at the Biology Sector. On the way back to the Biology Sector you will find this door to the left at the bottom of the lift. Use the Disposal Services Key on the door to unlock it and ride the elevator down to an underground storage facility. You'll spot a SK1P here.
Continue through the other unlocked elevator here to start the optional mission.
Disposal Services Facility[]
Enter the door at the bottom of the stairs and as you walk into the room you will be attacked. Defend yourself against the 6 Enhanced Fodders that appear. Enter the main part of the room and look on the table next to the lockers near the stairs to find a text log [Log 1/3]. Proceed through the unlocked door and kill the pair of exploders that make their way into the room. Enter the door to the left and take the lift at the end of the next hallway.
Upon exiting the lift, continue into the next large room and kill the pair of exploders and the four wasters that jump in through the vents. Once they are all dead, climb the nearby ladder. Go through the door at the end of the walkway and enter the door to the next room.
Use the console in here for a mini-game to unlock the nearby door. This will trigger an Exploder and four Enhanced Fodders to enter via the various vents around this room. Deal with them before proceeding through the now unlocked door. Continue onwards until you reach a catwalk with a raised bridge.
Climb down the stairs near the entrance. Here you will find another of those rotating fuse puzzles. Note that as soon as you touch one of the fuses a group of enemies will attack. They will come from three different vents around the room and consist of an Exploder, 3 Twitchers and 5 Enhanced Fodders. Once they are dead, return to the fuse puzzle.
To solve this, use the following steps:
- Turn the central fuse 2 times.
- Turn the top, right fuse once.
- Turn the top, left fuse 2 times.
- Turn middle, left fuse once.
- Turn bottom fuse once.
Once the puzzle has been completed, look in the alcove opposite to find a locker containing an upgrade circuit [Circuit 1/2]. Return up the ladder and cross the now lowered bridge. Take the elevator here to the next area.
Climb down the ladder at the end of the catwalk and head for the unlocked door. As you do a swarm of 10-12 Feeders will emerge from the vents along with a twitcher. Kill them before proceeding through the door.
Go through the next door and follow the passage round to the left. In the next room destroy the exploders that appear before continuing. Climb the ladder in the next room and enter the door at the top. Continue through the corridor until you reach another walkway with a raised bridge. Head to the far end of the bridge and use kinesis in the crank opposite to lower it.
Continue across the bridge and try to open the door. It will go into lockdown mode. A group of 10-12 Feeders and a pair of Enhanced Fodders will emerge from vents to attack you. You will need to kill them all to unlock the door. In this next room are a bunch of lockers to loot and a bench if you require it – you should build a torque bar if you don't have one. When you are ready, continue through the next door.
Follow the walkway over to the lift panel and hit it to summon the lift. Ride it down to the lower level and prepare to engage in combat! Six Enhanced Fodders will be alerted to your presence the second you step off the lift so get rid of them before continuing down the corridor to the left of the lift and going through the unlocked door.
In this room you will find a text log [Log 2/3] on the desk here. Unlock the room at the back of the area with a torque bar for an upgrade circuit [Circuit 2/2] and a weapon part – Full Zoom Scope [Weapon Part 1/5]. Enter the door to the left of the desk for a resource cache to deploy your scavenger bot (note there is also an upgrade circuit on the crates here in new game +). Return to the previous room and ride the lift up to the next area.
Enter the door at the end of the hallway and turn right. Kill the 3 Enhanced Fodders that come to join you. After that have a look around there is a bench here and a text log [Log 3/3] on a nearby desk. Grab that and enter the nearby door. Loot the lockers in here and continue into the next room.
This room looks familiar to another room we encountered in an optional mission earlier on. We’re going to have to call the lift here as well. Before we get the ball rolling though, instead of going down the stairs, follow the passage forward and around the corner to the right to find a S.C.A.F Artifact [Artifact 1/1] in a dead end.
When you are ready to fight, return to the main area and hit the button on the elevator to summon it. This stand and defend fight features a lot of different enemies so be sure to use the exploders explosives to help thin the numbers, keep moving and use as much stasis as you can to help out. In total there are 10-12 Feeders, 5 Exploders, 8 Enhanced Fodders and 6 Twitchers to defeat.
Once you have killed them all, the lift will lower to the floor allowing you to loot the chest. Here you will be able to grab 4 weapon parts – Precision Tip [Weapon Part 2/5], Conic Dispersal [Weapon Part 3/5], Ammo sweeper [Weapon Part 4/5] and Compressor [Weapon Part 5/5].
Return through the entrance door and take the elevator located opposite. We'll be back in that underground storage area again! Kill the twitcher and 3 wasters in here, use the bench and suit kiosk if required and then take the other elevator back to the surface to complete the optional mission.
Enemies[]
In order of appearance:
Walkthrough[]
")
 Disposal Service Walkthrough Impossible Difficulty (PC) (28 KB)")
| ||||||||