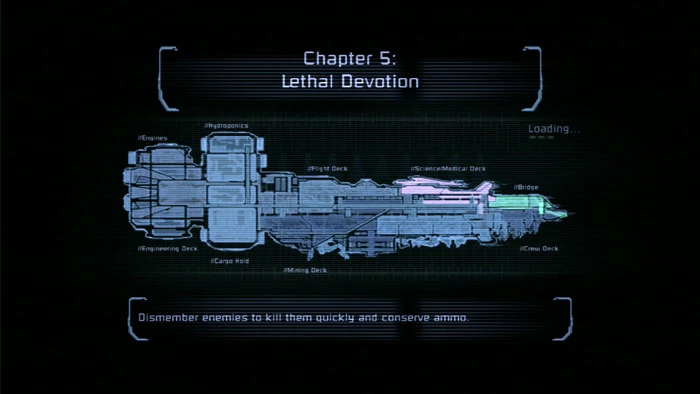
1. Chapter 5: Lethal Devotion takes place on the Medical Deck, first visited in Chapter 2: Intensive Care.
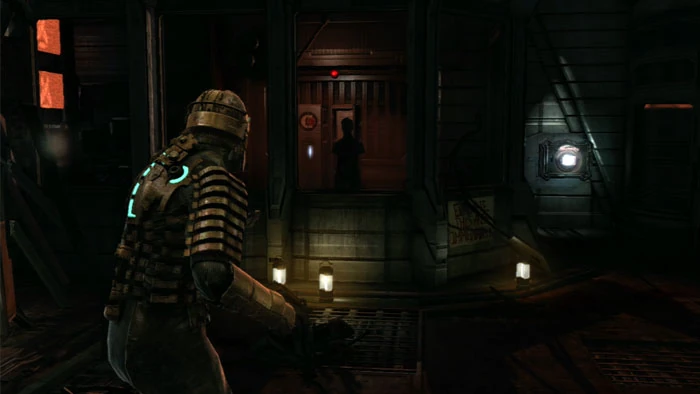
2. Receive a video transmission from Kendra once you leave the tram. Enter the Security Station and hear a strange message from a disembodied voice. Note the unlocked locker and Save Station. A Store is to the right.
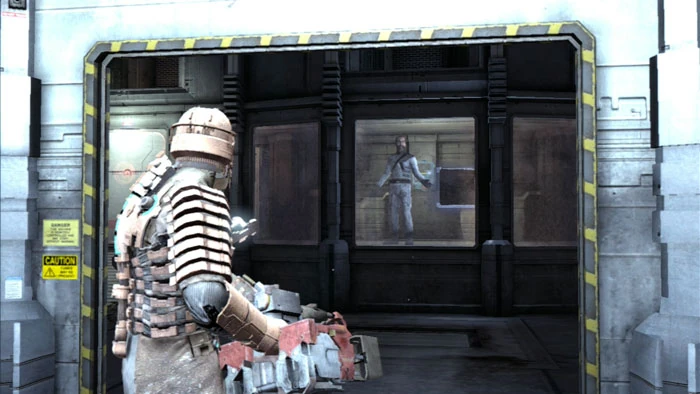
3. Continue through the Imaging Diagnostics door after Kendra unlocks it and be met by a pair of Lurkers.
4. Enter Imaging Diagnostics and raid the unlocked locker on the left.
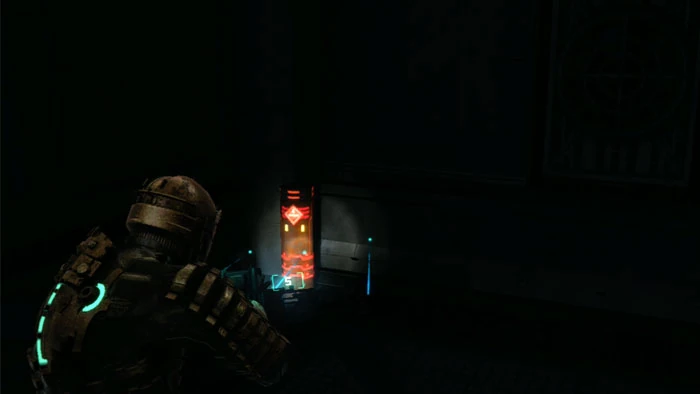
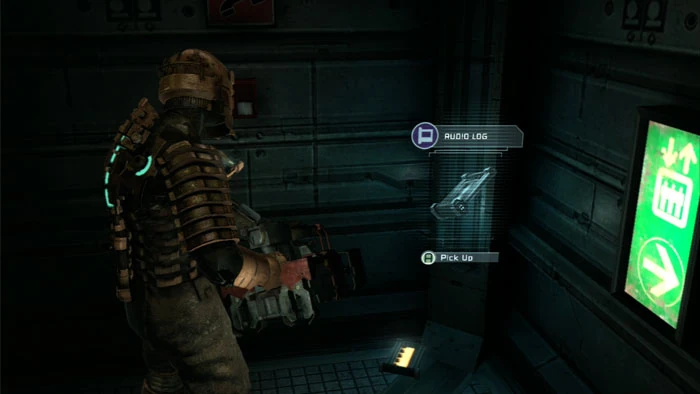
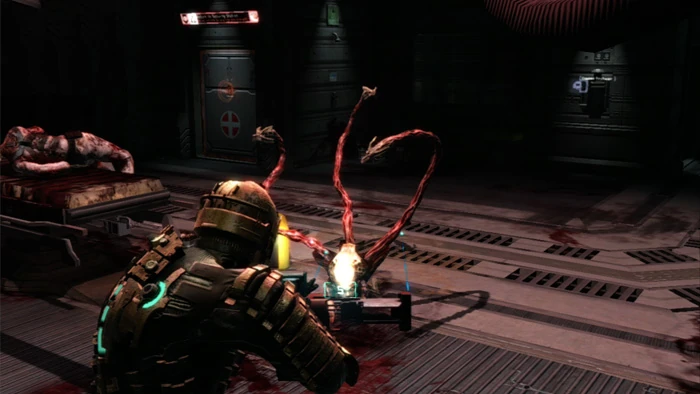
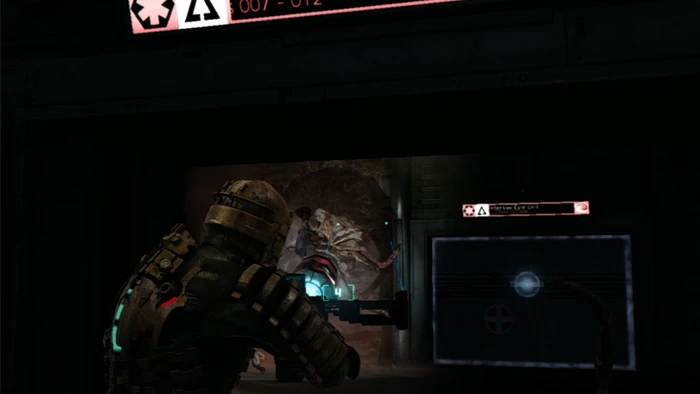
5. Use Kinesis to pick up this explosive canister in the right corner.
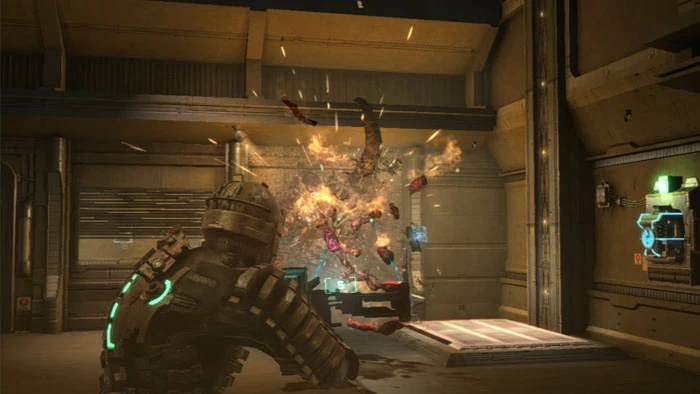
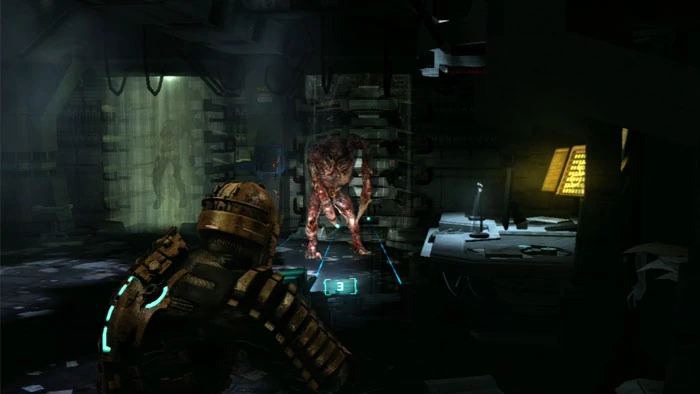
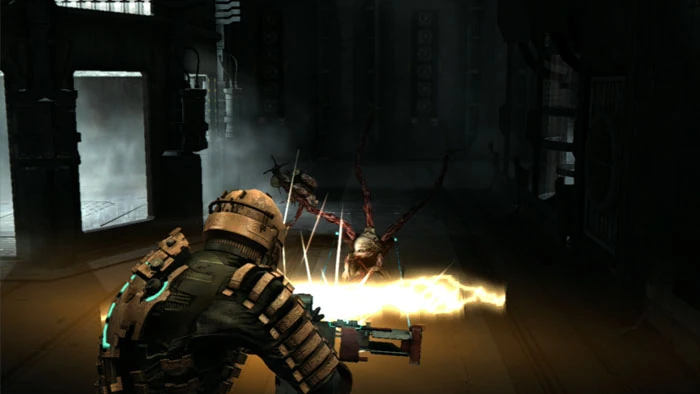
6. Carry the canister across the room to this new wall-mounted Necromorph, the Guardian. Launch the canister at the Guardian for a quick kill.
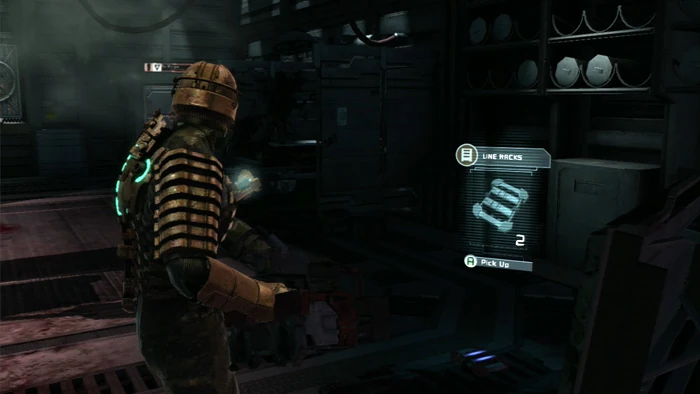
7. Find a pick-up here before riding the lift to the walkway above.
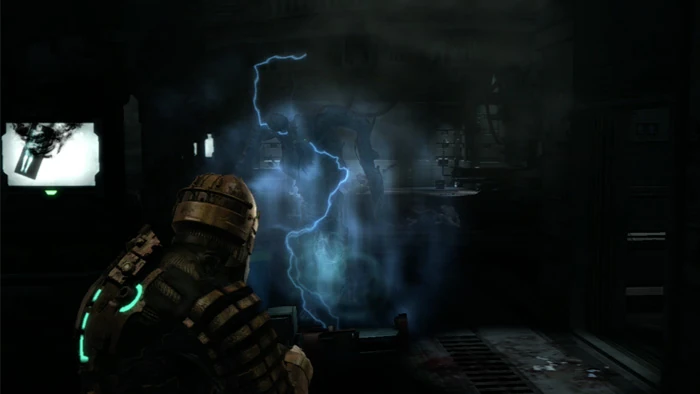
8. Battle a Lurker then use Stasis to slow the quickly-oscillating bridge, allowing you to pass. Repeat on the other side then continue toward Zero-G Therapy.
9. Pass through a Chemical Research Lab door, ride a lift down then find the Mercer's Experiment 1 audio log.
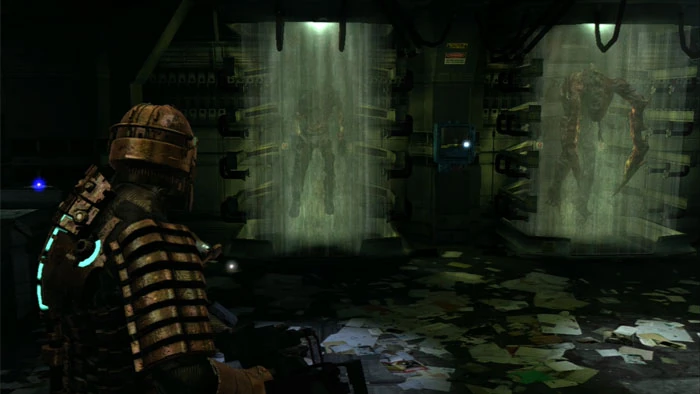
10. Enter the Chemical Research Lab at the end of the hallway and take a good look at these bottled Necromorphs. The one on the right sure looks big. A storage bin, two supply crates, a Power Node, the Force Energy Schematic and a pick-up are available.
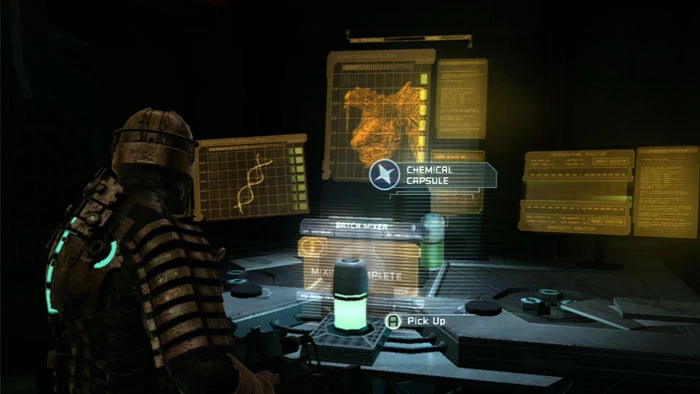
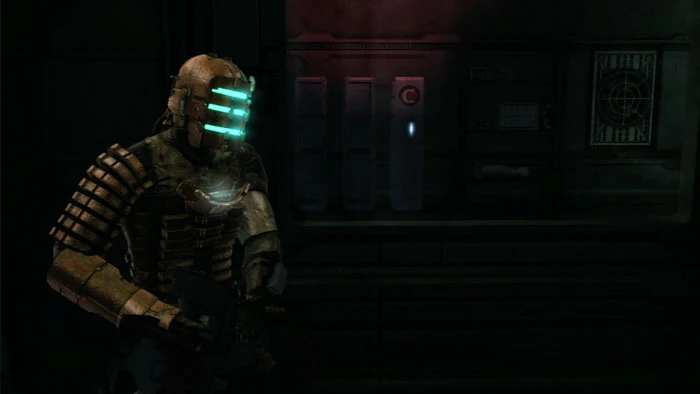
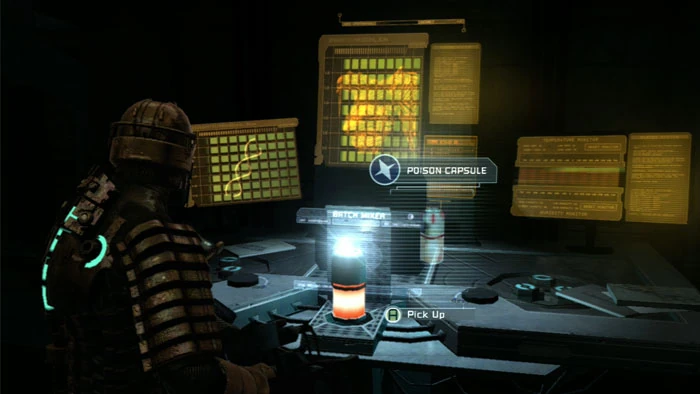
11. Activate the Batch Mixer then grab the Capsule to update your objectives.
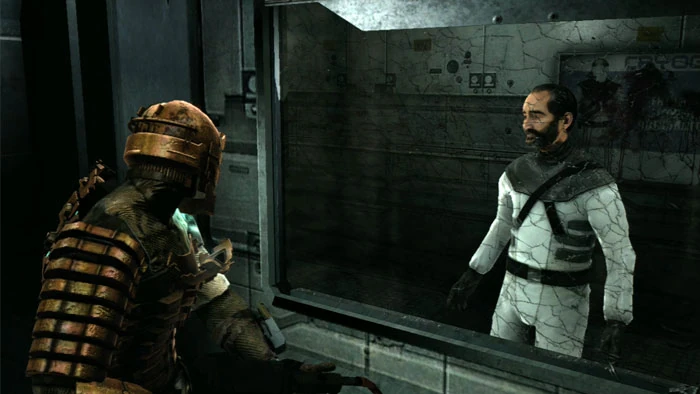
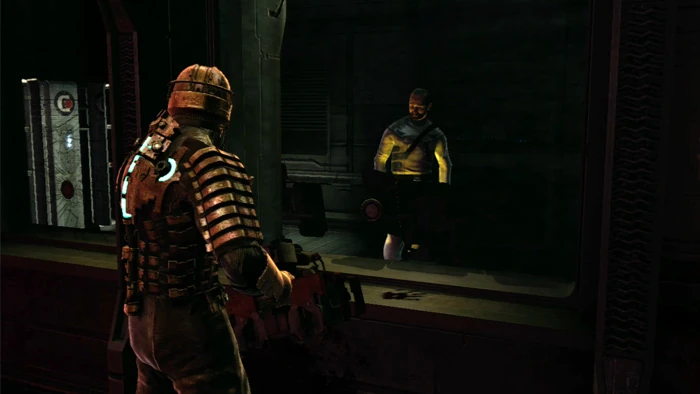
12. The quite-insane Dr. Mercer appears at this window. Ready a weapon as you listen to his rant.
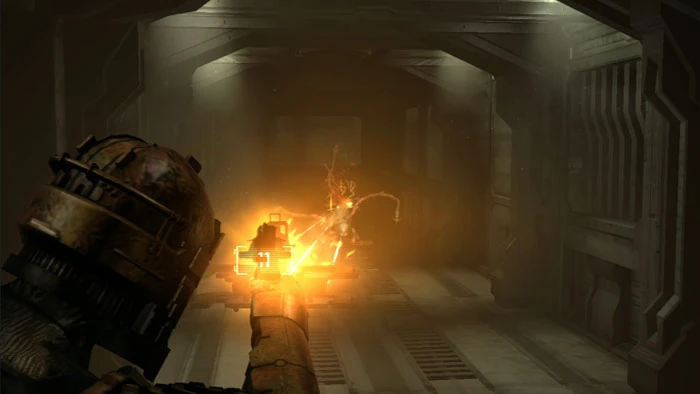
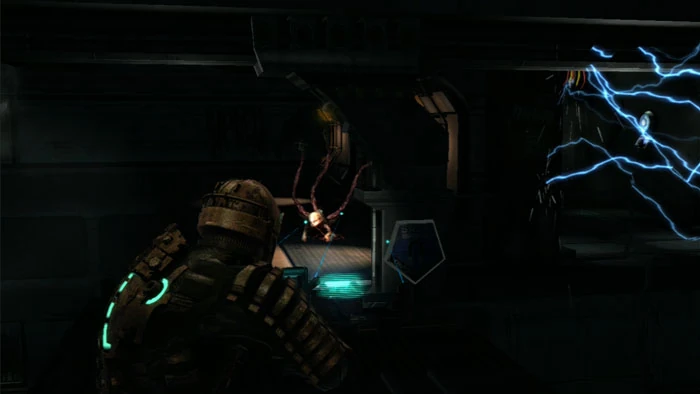
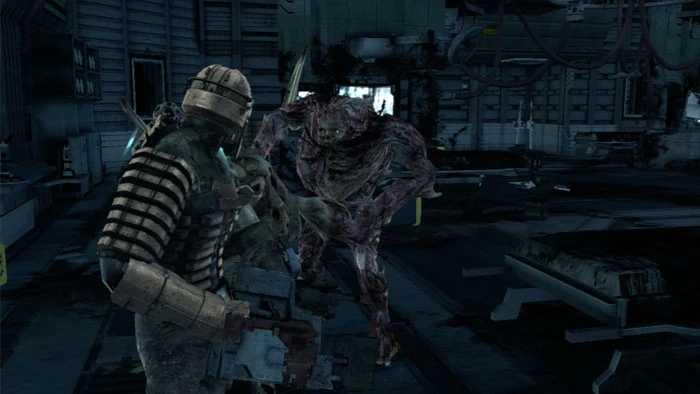
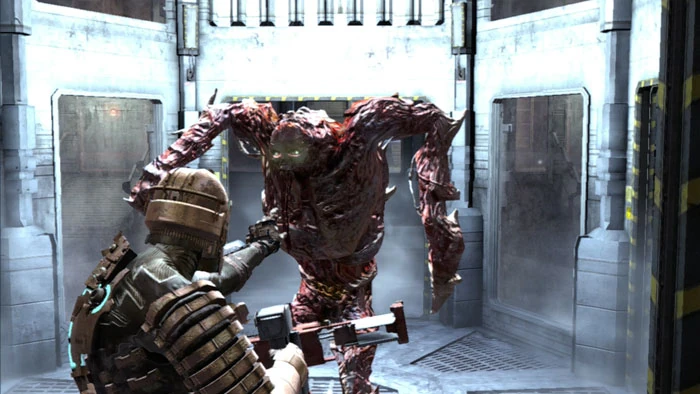
13. Dr. Mercer unleashes this new, terrifying Necromorph, the Hunter. Dismember the Hunter's legs or use Stasis to slow him down long enough for Kendra to unlock the Imaging Diagnostics door. The Hunter has the ability to regenerate severed limbs, making him essentially impossible to kill with conventional weaponry.
14. Escape to Imaging Diagnostics, leaving the Hunter back in the Chemical Research Lab. Proceed carefully as several Swarm waves are waiting for you. Stasis and a Line Gun mine take them out nicely.
15. Return to the Security Station. Your next stop is through the previously-barricaded door to the Ishimura Clinic.
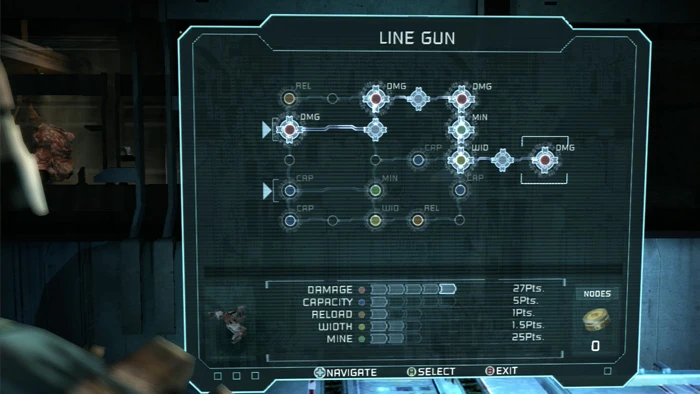
16. A very intense battle is coming up, so I recommend grabbing some items at the Store before continuing to the Clinic. I purchase Med Packs, Line Racks and two Power Nodes, allowing me to maximize the Line Gun's damage back at the Upgrade Bench in Imaging Diagnostics.
17. Enter the Ishimura Clinic and listen to creepy Dr. Mercer again. His last words are, "Say your prayers."
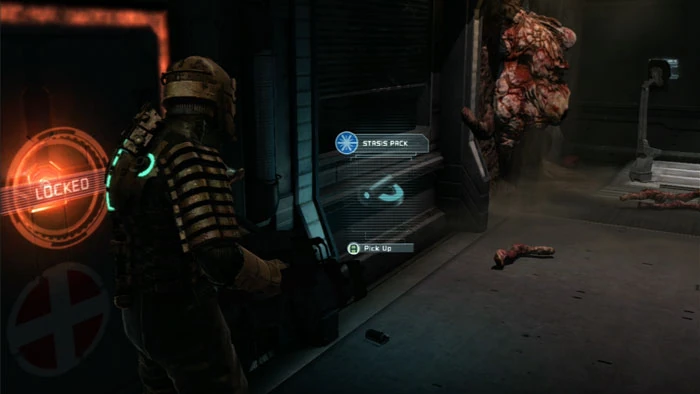
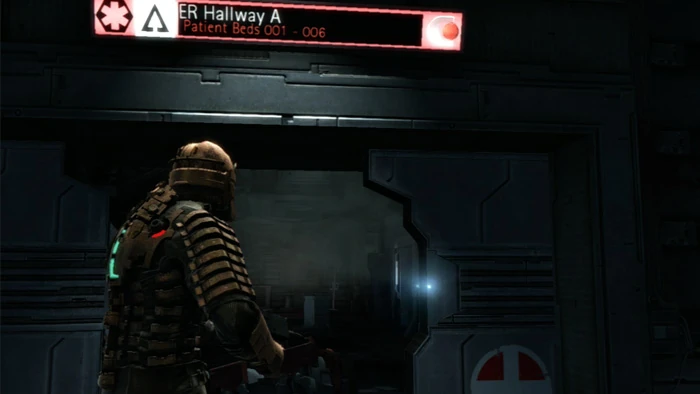
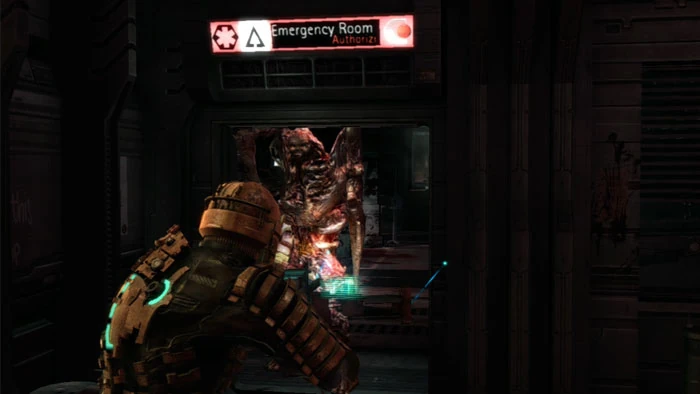
18. Continue through the Emergency Room door to the right. Quickly grab as many pick-ups as you can before the action starts.
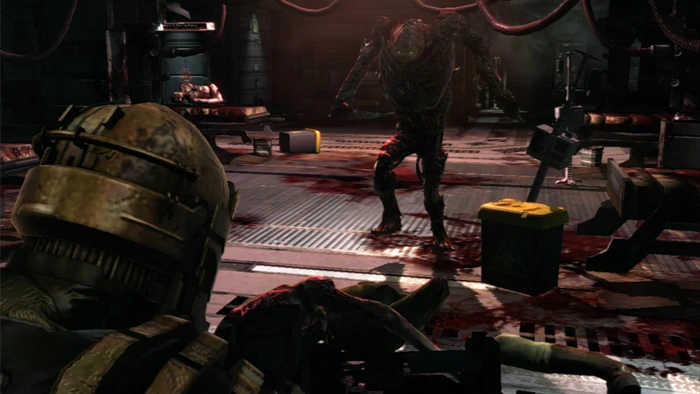
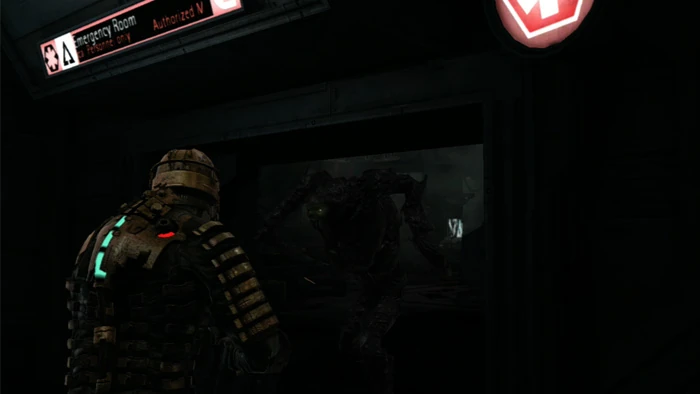
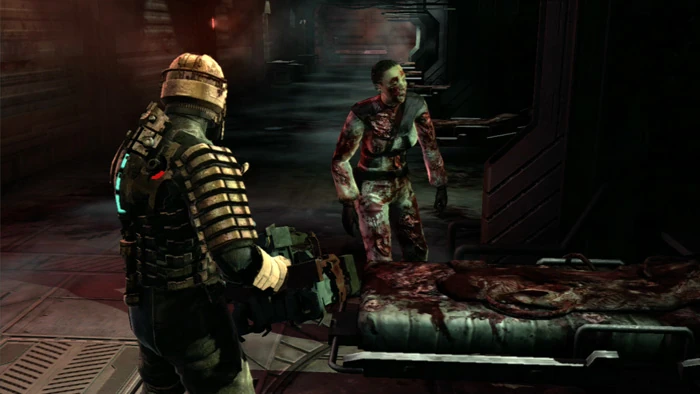
19. The regenerating Hunter is back, and this time he brought his friends.
20. Stasis the Hunter to hold him still (or shoot his legs). This will give you a short amount of time to focus on defeating the other Necromorphs.
21. The fight continues until everyone but the Hunter is defeated. Key to winning this fight is the ability to keep moving and pick up loot from your fallen foes, all while incapacitating the Hunter with Stasis or by hobbling him.
22. Kendra unlocks the door to Hallway A once only you and the Hunter remain. Make a last pass to grab any loot you can (including two unlocked lockers in a central room) then exit.
23. The Hunter will not follow you out of the Emergency Room. In fact, it's fun to taunt him from the doorway. Just be sure to step back if he gets too close, as his arms have quite a reach.
24. Find a pick-up to the right of the Emergency Room door then loot two lockers in this room. Find a pick-up left of the explosive canister seen on the left.
25. Launch the canister at this Guardian at the end of the corridor. A pick-up is directly ahead and a Gold Semiconductor is in the left corner.
26. This understandably hysterical woman is at the end of the corridor to the right where you can find two more pick-ups.
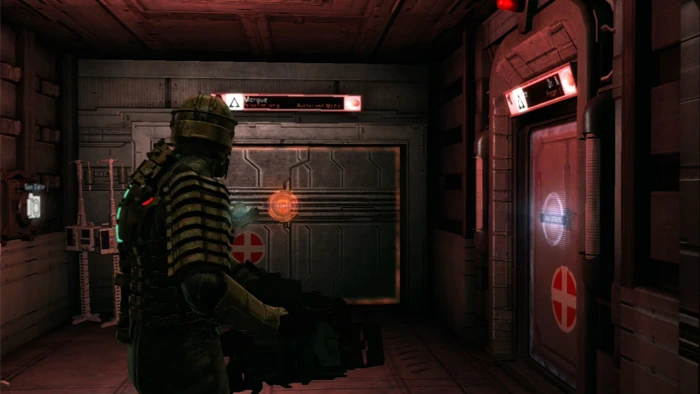
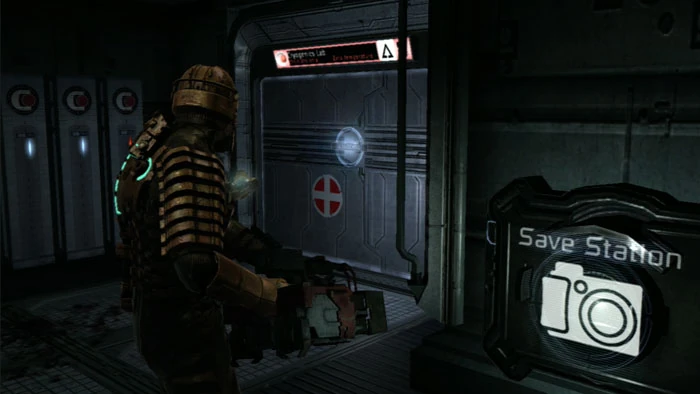
27. Continue past the Guardian to the Intensive Care Unit. Use the Save Station on the left before entering Dr. Mercer's office on the right.
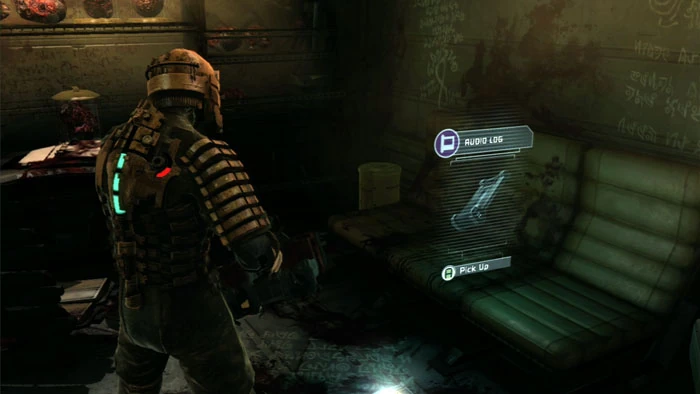
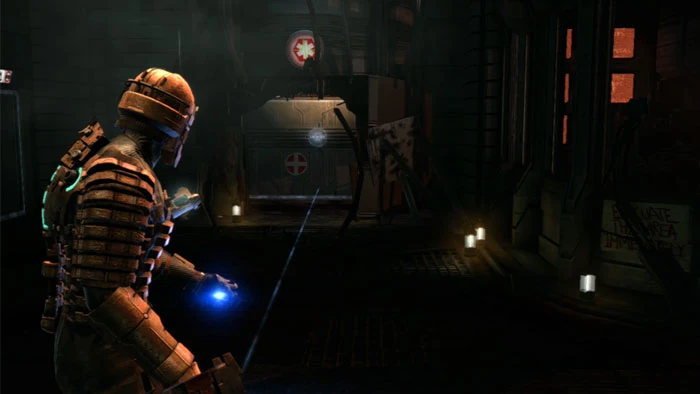
28. Mercer's office is suitably creepy, with Unitology symbols on the walls and dismembered heads on the shelves. Listen to the Mercer's Experiment 2 audio log then grab all the pick-ups, including a Gold Semiconductor, cash, two supply crates and a Medium Air Can.

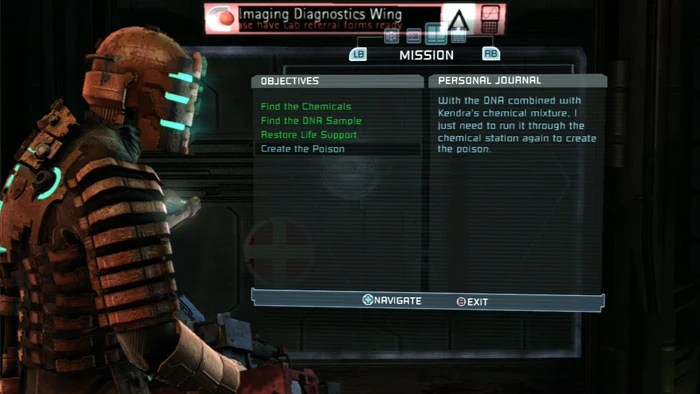
29. Only after all the loot has been gathered should you activate the Batch Mixer. Grab the DNA sample then get ready to run.
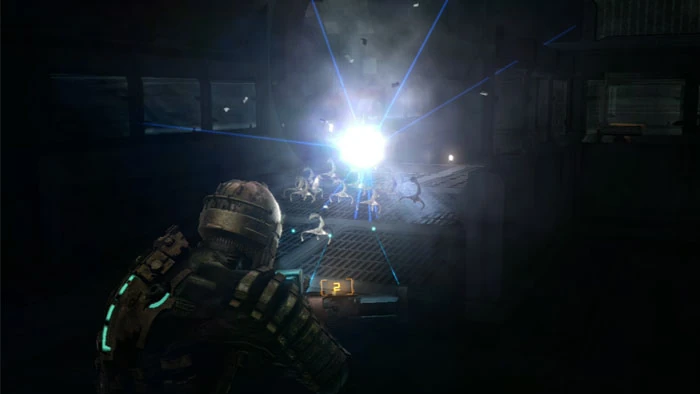
30. Mercer vents the atmosphere out of the Medical Deck and you're suddenly in a vacuum. You need to rush back to the Security Station and restore life support. A veritable menagerie of Necromorphs, including the Hunter, attempt to block your path. There's no need to stay and fight all of these Necromorphs as your Air is running out. Stasis when you need to and just run passed them.
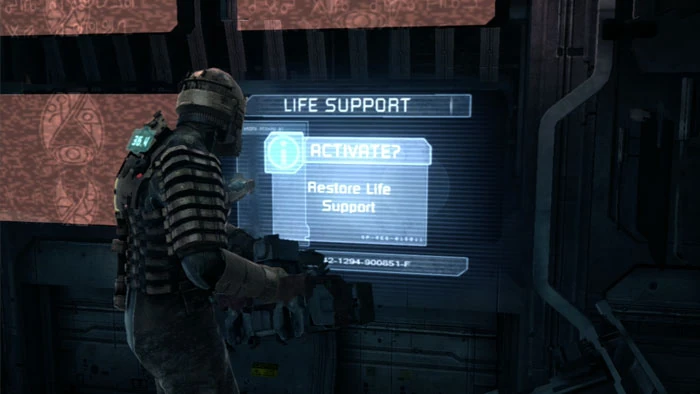
31. Follow your locator back to the Security Station and restore life support here.
32. If you're up for it, head back to the Ishimura Clinic with the lights down and the sound up - just to hang out. It's not necessary to finish your objectives but is chillingly thrilling. The Hunter is no longer bound to the Emergency Room.
33. Back to the task at hand. Fill up on needed items at the Store then re-enter Imaging Diagnostics.
34. Return to the Chemical Research Lab and use the Batch Mixer one last time. Pick up the capsule then exit once the door on the right unlocks.
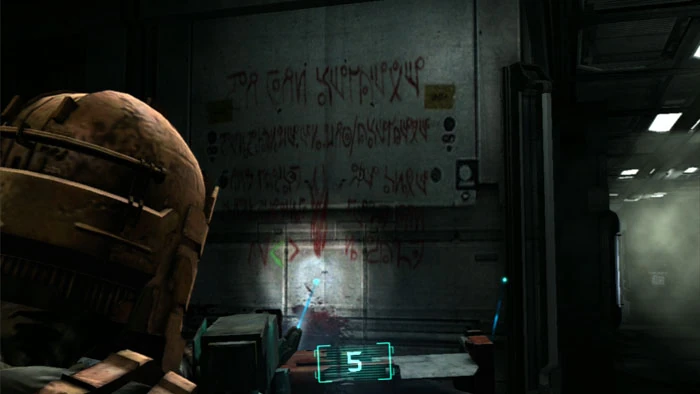
35. Keep right to find the fifth clue to the Five-Node Cheat, a left arrow. The fifth character of the cheat is an X. Two supply crates are to the left. Approach the Save Station seen far-right.
36. Raid the lockers on the left and use the Save Station before heading into the Cryogenics Lab.
37. Quickly fill up on Stasis at the Stasis Recharge if you aren't already full-up.
38. Don't worry about grabbing pick-ups just yet; there will be plenty of time for that later. For now, take up position here inside the cryo-chamber. Listen to Dr. Mercer and wait for him to unleash the Hunter one last time.
39. This is an exceptionally easy fight if you know what to do, impossible if you don't. Lure the Hunter into the cryo-chamber then Stasis him. Alternately, you can hobble him by shooting his legs. The important thing is that he be incapacitated inside the chamber.
40. Quickly head up this ramp then enter the control room.
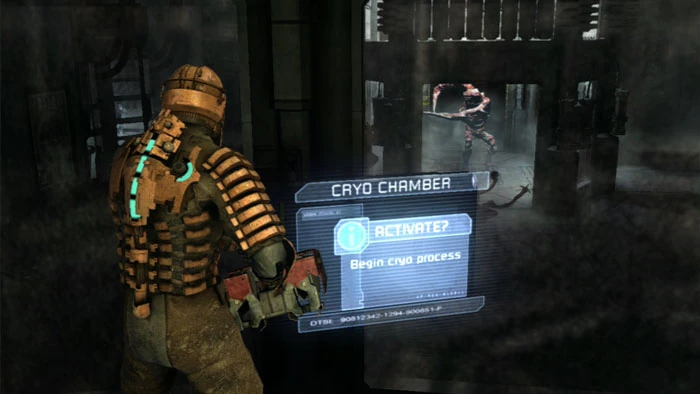
41. Use this panel to activate the cryo-chamber before the Hunter has a chance to escape.
42. Several Lurkers attack. The Line Gun mops them up without much difficulty.
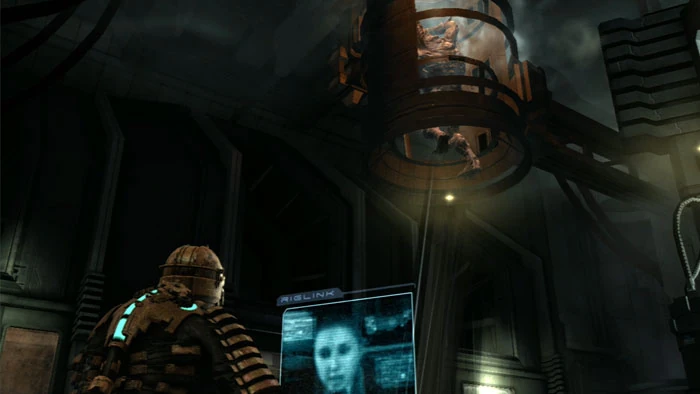
43. Kendra chimes in while the now-frozen Hunter is placed alongside the room's other frozen specimens. You've put the Hunter on ice, for now. Congratulations!
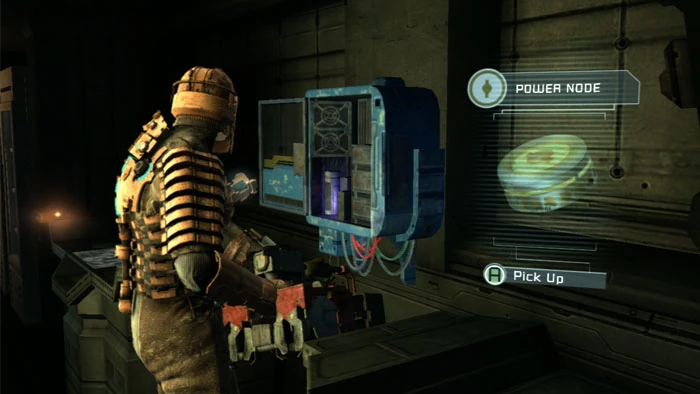
44. Collect your loot, making sure not to miss this Power Node inside the control room. Exit out the now-unlocked Tram Station door on the right.
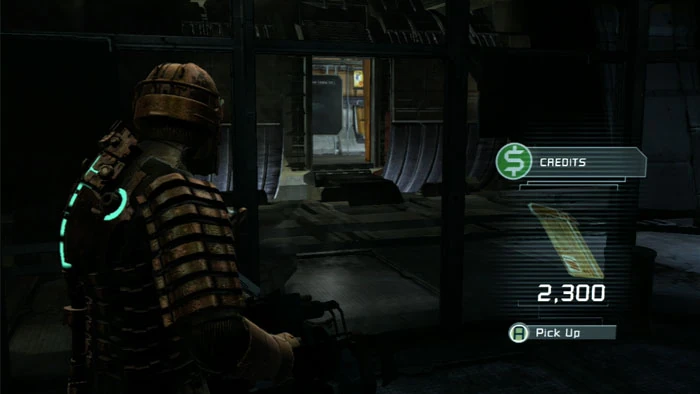
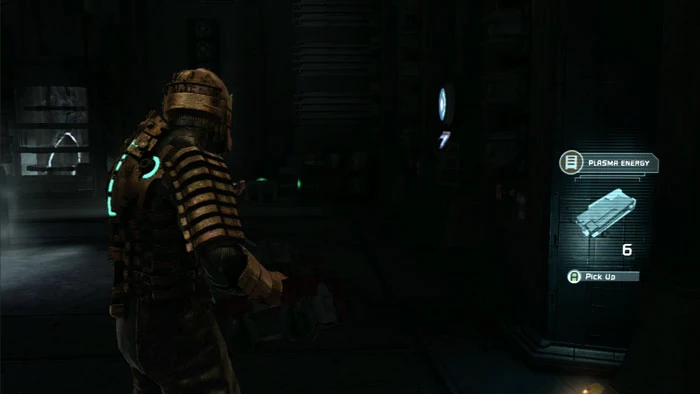
45. Grab this final pick-up in the station's waiting area then board the tram and use the panel to complete the level.
Sources[]
Visual Walkthroughs - Dead Space Walkthrough - Lethal Devotion
|
| |||
| |||
|
|