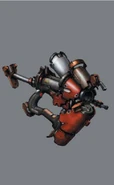
- "Detonator Mines are sensor-tripped mining charges that can be placed onto any surface."
- —Dead Space 2 Manual
The Detonator is a weapon in Dead Space 2 that deploys laser tripmines that stick onto any flat surface, be it a floor, wall, or ceiling. If the laser sensors are disrupted, the set mines will detonate violently.[1]
Description
The Detonator is described as a trip mine that can be placed onto almost all types of terrain. Once placed, the mines would deploy three trip-lasers that runs infinitely.[1] If the lasers are disturbed, the trip mine will detonate and kill/severely maim anything caught within the blast radius. If the Detonator's mine is not detonated, it can be picked back up after arming to be used at a later time (use the Alt-Fire function while aiming).
The Detonator can also be used as a grenade launcher, the mines fired will explode if they hit an enemy or the surface is not flat/moving with an effect and damage similar to the alt-fire of the Pulse Rifle.
In Dead Space 3, the Detonator can be crafted with parts, but the Canister Retrieval Module would only reduce planted mines into scrap metal, still wasting ammo.
Variants
- EarthGov Detonator (damage 10%, firing speed 5%)
- Heavy-Duty Detonator (reload speed 10%, damage 5%)
Combat Tips
- Obviously do not cross the beams when the mines are deployed as Isaac can detonate the mines himself and if he's too close, he will damage himself.
- The Detonator on its own is highly powerful, even when unupgraded, capable of killing even Enhanced Necromorphs in just 1-2 mines. Due to this reason, it would be best to reserve its mines for the later parts of the game, where Enhanced variants of the creatures begin to replace standard enemies.
- Use a combination of telekinesis and its secondary fire to retrieve the mine easily and safely.
- Don't be afraid to use the mines to cover your flanks. Even if no enemies trigger the mines, you can always retrieve them later. But beware, Isaac can't mine the whole room. There can be only five mines activated at the same time, the first being deactivated when launching a sixth. Set your mines strategically and take care to not lock yourself with your beams. Meanwhile, try to set the mines right in the middle of the path between you and necromorphs, and favor horizontal beam on wall at legs level rather than vertical beam on floor because many times, necromorphs may simply walk along your mines. Anyway, be cautious because it becomes quickly delicate to fight melee in the middle of a minefield.
- It can be used as a grenade launcher with its ability to detonate on contact, but be aware of the detonation radius if targeting enemies at close range. With enemies emerging unexpectedly from vents everywhere, you take a big risk to harm or even kill yourself accidently. Try to always keep your target at distance and don't hesitate to stasis and run to gain room. You must also have a great accuracy, because most of the time, the necromorph you miss once or twice will have time to come too close to be shot safely while you reload. Besides, it appears the blast of mines is weaker when launched directly as a grenade than when set up as a mine and detonated by the target itself.
- Remember that if you miss an enemy while using the Detonator as a grenade launcher, it will still do its primary function as a mine, and create its trip beam. Even if you're far enough, be careful of the direction of the beam if this happens since it extends infinitely and will still damage you if you cross the beam, regardless of the distance to the mine itself. Besides, you can't just set the mine under the feet of a necromorph while he's walking or running toward you because he will often just step over it the time it deploys. You must choose between the mining or the grenade launching tactic: the first one needs more strategy and anticipation, the second one needs more reactivity and rapidity.
- If you are suspicious of a vent, you may blast it open and lay a mine inside of it. Do not do this with all vents encountered, as most are harmless and, with many vents, you cannot retrieve your ammo.
- The Detonator excels in engaging enemies who tend to rush in to attack, such as Stalkers, the Pack, and the Brute. Mines may have to be detonated manually by shooting them, when deployed against the Pack, due to a long activation time. Note it isn't wise to use a powerful slow weapon against long waves of many weak enemies.
- Planting them on walls is useful and very effective against Lurkers that crawl on the wall.
- The mine can quickly kill Swarmers by firing in the center of the group, but you may miss a few one if they are too scattered, and the same can be done for The Pack.
- This weapon is not advised against Pregnants which can unleash Swarmers after being blown up.
- The Pukers are remarkably resistant to the mines launched directly on them, requiring 4 or 5 shots to be destroyed for the enhanced variants. Besides, if you're unlucky, they can detonate the mines in air with their acidic balls providing you fire at the same time. On the other hand, they die quickly when crossing deployed mines, and they're a good illustration of the damage difference between the two tactics.
- This weapon is perfect against Guardians as one direct fire mine will completely kill it. However, damage upgrades are recommended before doing this, according to the difficulty setting.
- This weapon works best in tight corridors. Just don't be too close to your own blasts.
- The Detonator is extremely efficient against Stalkers. Since the places you encounter Stalkers always have narrow passages and many surfaces, like the warehouses, (save for the first encounter in the Unitology Church) you can place mines all around yourself. The Stalkers will charge right into them.
- In Dead Space 2, it is useful to have the Detonator on you at all times, since it is much, much more effective at dealing with Stalkers than any other weapon. In Dead Space 3 however, it is recommended to only carry a Detonator into confined areas, due to the reduced carrying capacity.
- The Detonator is also very useful for taking out Nests. Due to only being in encountered in Zero-G (where all projectiles go in a straight line) and the large blast radius the mines have, a single Detonator can easily kill a Nest before spamming volleys upon volleys of projectiles at Isaac.
- The Detonator is heavily recommended for the elevator battle on the way up to the Solar Array, a single Detonator Mine can damage or even kill two Tripods if they are next to each other in the windows, just be aware of the blast radius.
- If Isaac is in range of a mine when it detonates, it will knock him on his back, leaving him wide open for Necromorphs to attack him. Keep this in mind and only have the Detonator equipped before engagements or certain instances, otherwise you may instinctively fire on sight if startled by a Necromorph, causing unnecessary damage to yourself and leaving you open to attack.
- In Dead Space 3, the Detonator is ineffective in outside areas on the surface of Tau Volantis due to the fact mines will automatically detonate upon contact with snow-covered surfaces. It is largely recommended to save the Detonator for inner structures.
- In Dead Space 3 if you shoot an enemy with the Detonator, it may not explode, but will still hurt and kill enemies.
- It is a good idea to put reload circuts on the canister recovery module instead of the survey charge in Dead Space 3 so you have more room for other circuits.
- The Detonator from Dead Space 2 can be recreated in the sequel by placing a Survey Charge with a Directed Ejection Field tip on a Heavy Frame. However, using the recovery module changes a trip mine into scrap metal, and its value of "1" is far to pay the cost of a universal magazine (100 scrap metal for 5 ammunitions). Besides, scrap metal is the most abundant resource in the third game.
Trivia
- The Detonator of Dead Space 2 appeared like a combat weapon due to its mines exploding from the movement of anything whereas rocks do not move in mining activity. Some speculated they may be used to destroy certain asteroids close to ships and to clear out ship debris in zero gravity areas. However, Dead Space 3 reveals it is built from a seismic survey tool, probably used in drilling prospection.
- Like most of the weapons in Dead Space 2 the Detonator has its own achievement/trophy. It is called "It's a Trap!" and is earned when the player kills 20 enemies with the Detonator when the mines are in a deployed state.
- The name of the achievement/trophy "It's a Trap!" is a reference to the film Star Wars Episode VI: Return of the Jedi: Admiral Akbar yells "It's a Trap!" when his Rebel strike group runs into the entire Imperial Fleet.
- Sometimes, if you launch a mine, Isaac or Gabe will pull back the part where you insert the Mines. This doesn't do anything except make the fire rate go down.
- In Dead Space 2, if you have at least 1 DLC Detonator, it is theoretically possible to gain infinite credits / detonator mines. By buying the weapon, launching the mines already loaded in, then deactivating them, collecting them, and selling back the weapon and mines. With mines valued at 200 credits, this can net you 600 Credits each time you do this (1200 with the two DLC detonators), and can be repeated at the store indefinitely. Be careful through, as activated mines can be set off by almost anything. This is extremely tedious, though, and thus best used only in situations where it is absolutely necessary. Note there is no use to upgrade the weapon if you want to repeat the operation all along the game. However, once you find the schematic in chapter 5 or starting at the first store if you have the two DLC detonators, you can still upgrade one and use the other to provide you infinite ammo. Strangely, with DLC's, the upgrade of any weapon will apply to the other variants, allowing to accelerate the process. The best tactic is the following: once you reach the first store, buy one DLC detonator for free and upgrade its capacity circuits as quick as possible. NB: You need a minimum of 13 nodes to upgrade the detonator capacity to its max. You are supposed to have four nodes when reaching the first store, and one branch starts directly on the first CAP circuit. It means that, if you want the total upgrade immediately, you must do the trick 13 times to buy the two nodes required to unlock the second circuit, 15 times to buy the three nodes till the third, and 16 times to buy the four nodes till the fourth. However, with an average of four nodes by level, you can as well save time by seeking nodes directly on the path. Besides, don't forget the money that you save by not spending it in ammo, since the game still give resources at the same rate. Until chapter 5, you can do the cheat with the only other DLC detonator but as soon as you find the schematic of the standard detonator, go to the store, buy it and put it in the safe. At this moment, with a full upgraded capacity, the exploit is optimized: sell and rebuy the two DLC detonators, launch the 14 mines loaded in (max of 7 by weapon), retrieve them and sell the whole for 2800 credits if you want money, or keep the ammo if you want to use it for future fights. Repeat the procedure as much as you want (be careful to always keep at least one detonator to not accidentally "sell" your upgrades). Note that you can as well sell and rebuy the DLC detonators one after another if you don't want to pay for the standard detonator, but it's more laborious than doing it two by two, and it's not worth taking the risk to make a slip up and lose your upgrades in the course of a long chain.
- An alternate method is possible at the bench. Respec your Detonator and refill the circuits progressively. Before to unlock each CAP circuit, launch all your mines. Each time you upgrade this circuit, your magazine will be refilled automatically. With four CAP circuits, it means you can do this five times from zero, giving 3+4+5+6+7, that's to say 25 mines. This ammo costing 400 credits, you save 5000 credits from the store but you can only recover the cost of the respec by selling. However, since the effect works on every variants, you will get 75 mines with the three Detonators equipped by Isaac, which means a net profit of 10 000 but it forces you to fight with only two weapons along the game. It's not necessarily faster than the previous method, but it can be useful when you run out of ammo on the path between two stores, only a bench within possible reach.
- Thanks to this bug, the Detonator can be considered the cheapest weapon in the game after the Hand Cannon, and is indispensable in hard difficulty settings, whatever reproach you may formulate beside.
- There are random Detonator Mines placed in corridors around the Sprawl, possibly placed by survivors setting traps from advancing Necromorphs. These mines cannot be disarmed and must be destroyed to proceed.
- There is a possible glitch in which a detonator mine will not disarm with the Alt-Fire. This can be resolved by launching another mine, then you can disarm both.
- There is a funny glitch in fights with cinematic movement, for example after the tram crash or the fight against the Tormenter. If Isaac walks on his mine, he won't immediately die but continue to move with only his remaining members and the weapon floating in the air. He then dies when the player takes control back. This is caused due to these scenes being scripted events.
- The Detonator mine cannot touch the Marker, whether this was intentional or a glitch is not known.
- The Detonator is one of the few weapons of Dead Space 2 to have a Special upgrade on the Bench. It increases the blast radius of your Detonator Mines.
- Although the Detonator is one of the few returning weapon configurations of previous games to not have a blueprint in Dead Space 3, the weapon can be recreated in the game, using a special survey-charge specific module called the Canister Recovery Module as the lower weapon.
- The Detonator has a blueprint specific to Dead Space 3's Classic mode. The resulting Detonator however is bugged, and its Canister Recovery Module, although present, is nonfunctional, leaving the player unable to de-activate any deployed tripmines.
- If Isaac sets off a Detonator mine by walking into it when low on health, he will be blown in half.
- There is a glitch in Dead Space 3 where the detonator can reload indefinitely. This, however, does not affect the player's ammunition.
- Also one direct shot on a Guardian will kill it instantly on Casual.
- When you save to quit the game, the set mines will have disappeared once you load back. Be careful to deactivate and retrieve them before.
Appearances
- Dead Space 2
- Dead Space 2: Severed
- Dead Space 3
- Dead Space 3: Awakened
Gallery
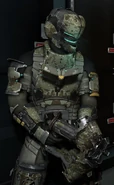
EarthGov Detonator with a matching EarthGov Security RIG
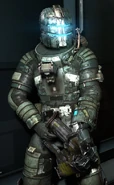
Heavy Duty Detonator with a matching Heavy-Duty Vintage RIG
Sources
| ||||||||||||||||||||||||||


